Friday, October 29

AltRider Gear for BMW R1200GS Installation

Today we have two videos that feature AltRider technicians demonstrating how to install AltRider protective gear onto a BMW R1200GS. The first video is the installation of the Potentiometer Guard and the second video is the installation of the Crash Bars. Sometimes an instruction manual on its own can be tricky so these videos serve to really simplify the installation process.

First is the Potentiometer Guard installation. The Potentiometer on a GS measures resistance based on the location of the throttle opening. If damaged, it can not send resistance measurements to the bike's computer and without this information, the computer will not allow the bike to start. It is an extremely delicate piece which truly necessitates this guard. The installation is relatively simple as you will see demonstrated in the video below.


Next is the demonstration of installing Crash Bars on a R1200GS. The BMW motor is extremely wide and needs to be protected from damage in the event of a crash. AltRider crash bars are 1-inch stainless steel with a shot peen satin finish, which protects them from rust meaning that they're durable for multiple spills. They are designed and assembled in the US, and TIG hand-welded for added strength. These crash bars protect the cylinders and the engine casing, deflecting all impact that strongest areas of the frame. While most other crash bars utilize tabs or flanges, AltRider crash bars actually mount to the bike's frame utilizing existing hardware native to the bike. Check out the full detailed demonstration below.


AltRider builds high-quality American-made ADV bike protection. Check out RevZilla's BMW R1200GS with the full gamut of AltRider protective gear in the video below.


-RetroZilla

Related:
New October Motorcycle Gear and Deals

Thursday, October 28

2 Guys on 3 Bikes: RevZilla's Arizona GS Adventure


Shot with Drift 170 HD Camera in 720p. Watch in Full screen.

So I have been back in the office, letting the AZ trip Matt and I just concluded marinate for about a week or so. At the moment I am still waiting for the insurance adjusters to call regarding the 2010 GS I enjoyed for the first 36 or so odd hours of the trip, but that is a story I will get into more during day two's recap.

Two weeks ago, Matt and I flew out to Arizona to meet up with the boys from Firstgear and go demo some of their new TPG adventure touring line. As most gear geeks know in 2009 Firstgear redesigned all of their Jackets, so for 2010, completely revised pants across the line were naturally the focus. Last year I flew out solo to Colorado and met up with a whole bunch of moto nuts to spend Thursday through Monday on the Southwestern Colorado twisties and dirt summits on a 650 "wee-strom". It was the first of what seems to be a likely trend of yearly gear-testing adventures. This year was all about the desert, the heat, BMW R1200GS's and a sprinkling of killer cacti...

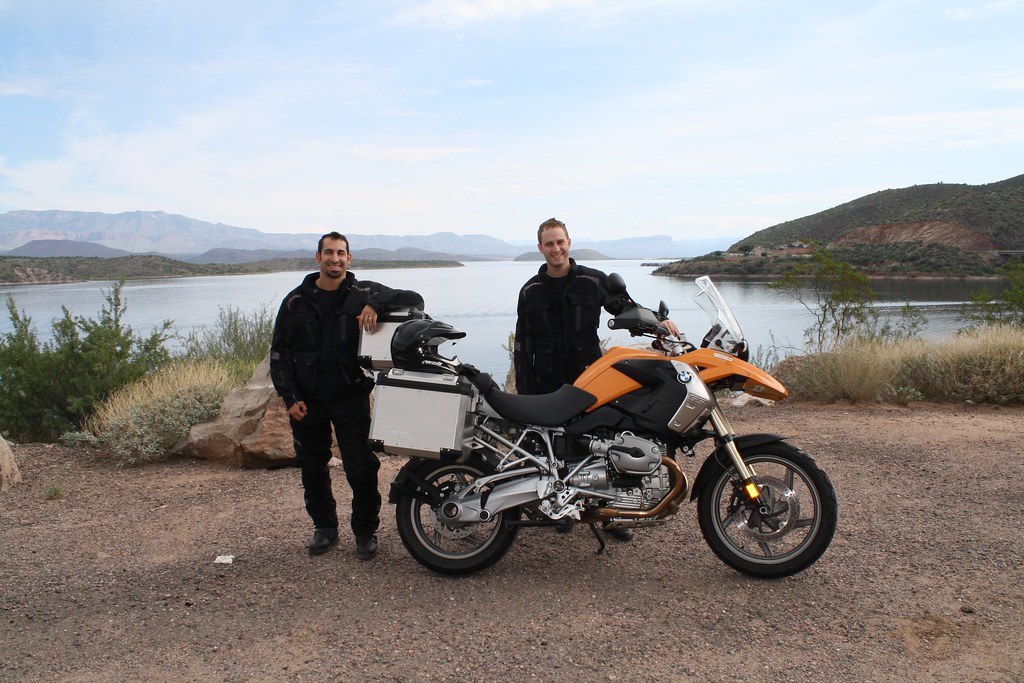
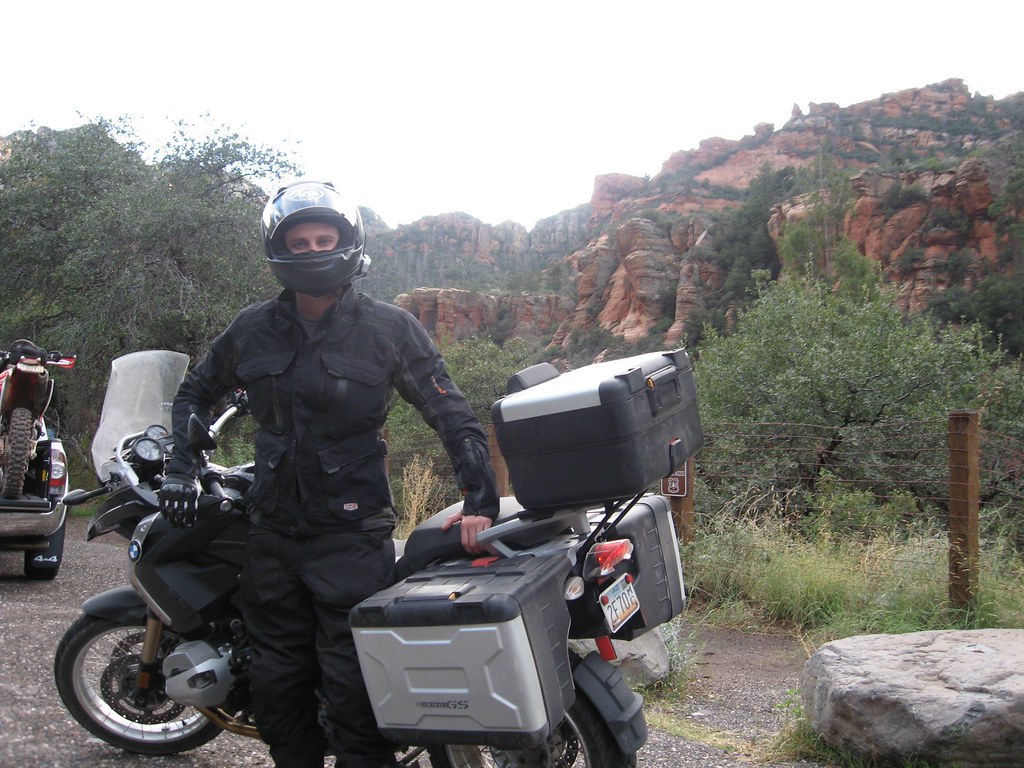
 Matt and I at Roosevelt Lake Pit-stop -  Day 1

We flew in on Thursday, 10/17 to Phoenix and shot straight to Eagle Rider in Scottsdale to pick up our bikes and meet up with the rest of the squadron. As it turned out there were some last minute bailouts so we ended up with around 8 folks, down from 20 the year before. Upon arriving, Matt and I realized that I had misread an email and rather than having a chase vehicle show up nightly at our hotels carrying our bags, we would need to be packing our hardcases with all of our items, clothing and gear for the 4 day trip. All good, but unexpected and hilarious that our first task was trying to find shade in the Eagle Rider parking lot while completely pulling our luggage apart and jamming everything into the top and side cases on these rental bikes. Sad clown moment #1.


Our plan was to leave from Scottsdale (#1 on the map above) and make a counter-clockwise loop around the surrounding Arizona destinations, with Flagstaff being at the 12 O'clock midway point. We were planning on averaging about ~250 to 300 miles a day at pretty uptempo pace.

If there's one thing I have learned from these western and mid-western industry rides, it's that they are not for the faint of heart, and somehow it's an unwritten rule that pavement and traffic markings seem to be only taken as suggestions. I am still digesting that riding style, as the East coast is typically much less forgiving of the two wheeled liberties we took in dealing with slower motorists, stop lights and double yellow lines.

They set me up on a low mileage 2009 Namibia Orange R1200GS with the steel BMW cases. Matt was on a black 2010 R1200GS with a low seat and the plastic beemer hardcases. We both wore Firstgear TPG Rainier Jackets and the new for Fall 2010 redesigned Firstgear HT Air Overpants, which are mesh composite and designed for the heat.

I was wearing an Arai XD-3 Helmet and Matt had on a new Arai RX-Q Touring Helmet. We had Cardo G4 Bluetooth Headsets on both. The goal was to put 900-1000 miles on some of the new gear in a warmer temp range to really get a gauge for performance.

DAY 1 - Scottsdale to Pinetop - 247 miles.

The first day saw us leave from Scottsdale into the low 90's heat and shoot out of the "city" on 87 East for our first set of AZ twisties toward Globe, AZ. Two lane highway twisting at Freeway speed was enough to get the blood pumping as we slung these loaded up "pigs" around through the apex's - looking out for the "lowside special" - loose gravel at the mid-points. It is always amazing to me how nimble the R1200GS is even with a full payload. I had ESA on my bike so it was nice to be able to switch from Sport to Normal to Comfort modes for different segments of the ride over the 4 days. It really saved my ass. :-)


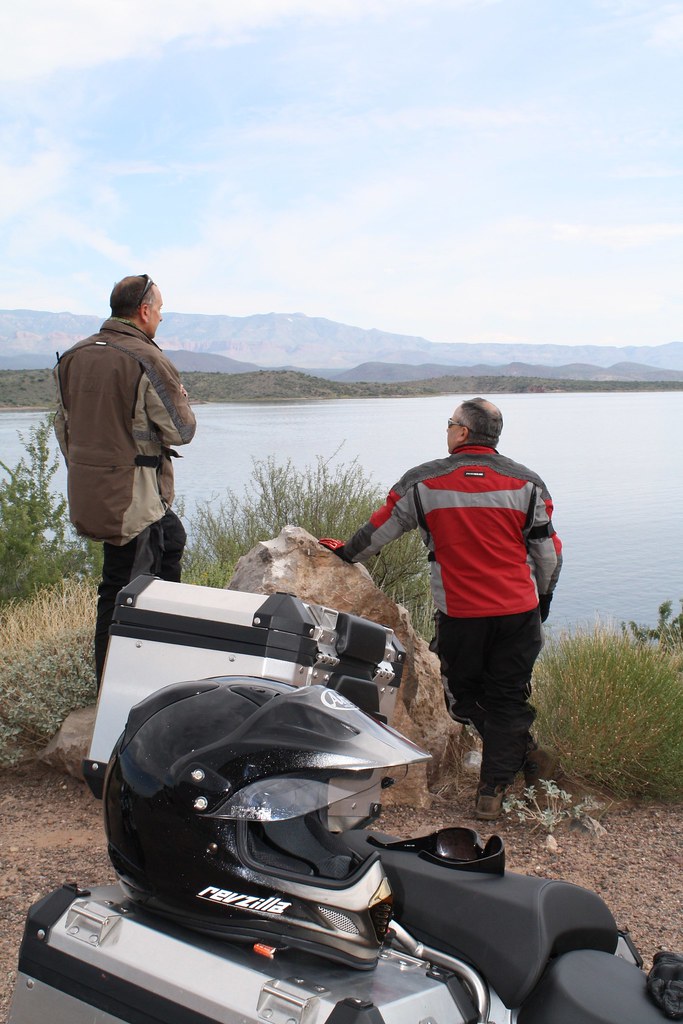
Scott and Joe contemplating the meaning of life....or talking about "final drives" again.

We made it to Roosevelt Lake before lunch for a quick stop. Then rallied and shot down to the Roosevelt dam which was pretty cool and just rebuilt in the last 20 years. The temperature range had dropped once we made it out of Scottsdale and this was beautiful mid-70's riding at its finest.

Roosevelt Lake was noonish and we still had not eaten, so we hopped back on the road toward our eventual destination of Pinetop which was still  about 150 miles away. The next stop was Judy's Cookhouse which was the essence of a Southwest diner nestled in the middle of nowhere. I say that with love. Fried Chicken and burgers hit the spot a Judy's followed by a 5-hour energy to counteract the food comas we all were fighting post lunch. There was no room to be sleepy on this ride.

From Judy's we shot down to Salt River Canyon for some more twisties. Really amazing riding. Nearing the top we hit a 15 minute cloud burst and quickly pulled over to close up our vents. The waterproofing is 100% my favorite part of the TPG Rainier Jacket. The waterproof breathable membrane is bonded to the outershell and never needs to be put in or taken out - you have it all the time. The Rainier jacket becomes instantly waterproof upon closing the vents. The Firstgear HT Air Overpants are Mesh and we did have the liners out so our legs got a bit wet, but it was not enough to try to stop to throw our liners on. Matt had REV'IT! Rival H2O Boots and I had SIDI Adventure Rain Boots so our feet stayed quite dry. Expected. It's nice when the high-end gear does it job.

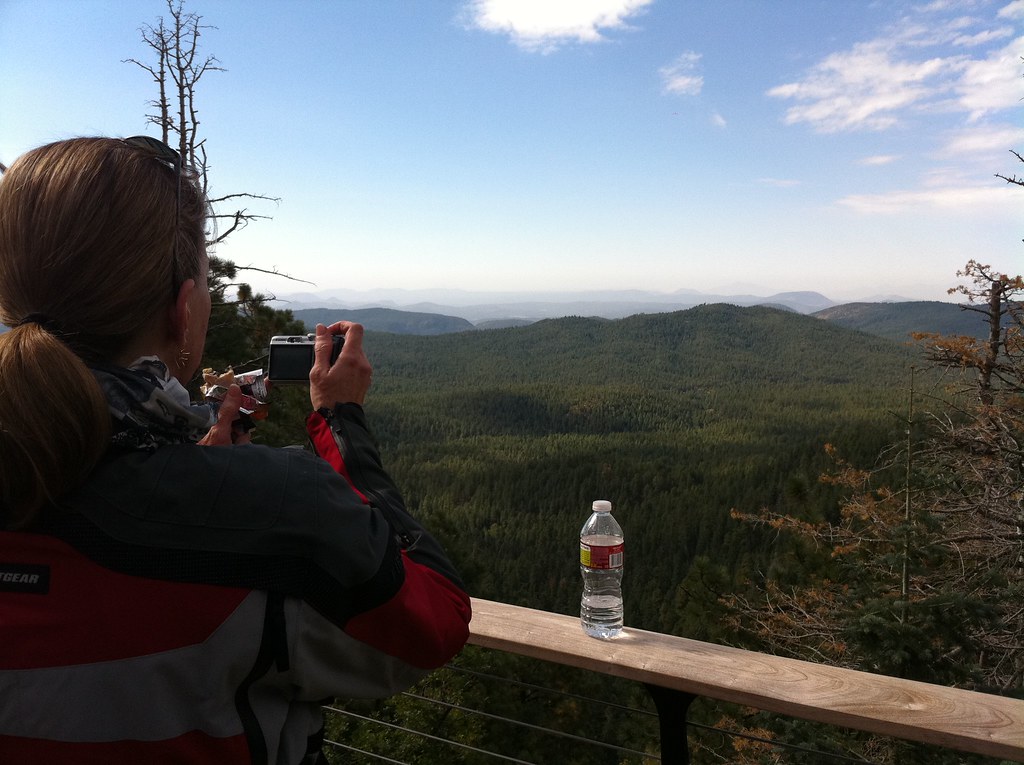
Here is Matt at the top of Salt River Canyon on the way to Pinetop.

Toward the bottom of the Salt River Canyon we did some riding standing on the pegs which was awesome to get some evaporative cooling on our legs as we hit the low lying heat again and then shot over to White Mountain where we lost a rider and had to send Joe on 10 miles of speed limit breaking to go catch Mark as he unfortunately had zipped past us stopped at a gas station, continuing on in the wrong direction.

From White Mountain we headed off to Pintetop and the lovely Hampton Inn. It was a good days ride comprised of nearly equal levels of excitement and relaxation. A much needed respite from dreary old Philadelphia in October.

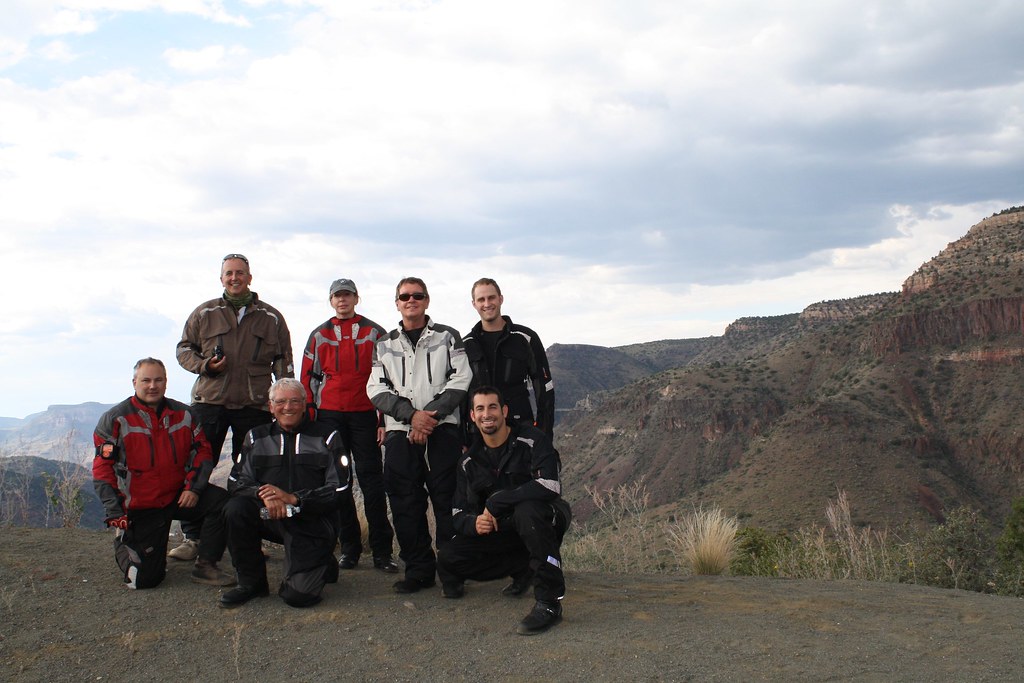
The Crew pulled over atop Salt River Canyon for a group shot.

The night ended at a great Mexican restaurant in Pinetop called Los Corrales. Chimichangas and marg's for everyone.

My last memory was practically hallucinating, fighting sleep on the hotel bed, to stay awake to watch one of my favorite Philly Chefs win on Iron Chef.

Check out the Flickr Photo Gallery of Day 1

Day 2 - Pinetop to Sedona and a total mess - 300 miles

Day two was fun. It started out harmlessly as a ride from Pinetop in the mid-40's then turned hairy, then a mess, and eventually a hairy-mess. You have to love the true spirit of the Adventure ride. This is where the 3rd bike for two guys comes into play, unfortunately.


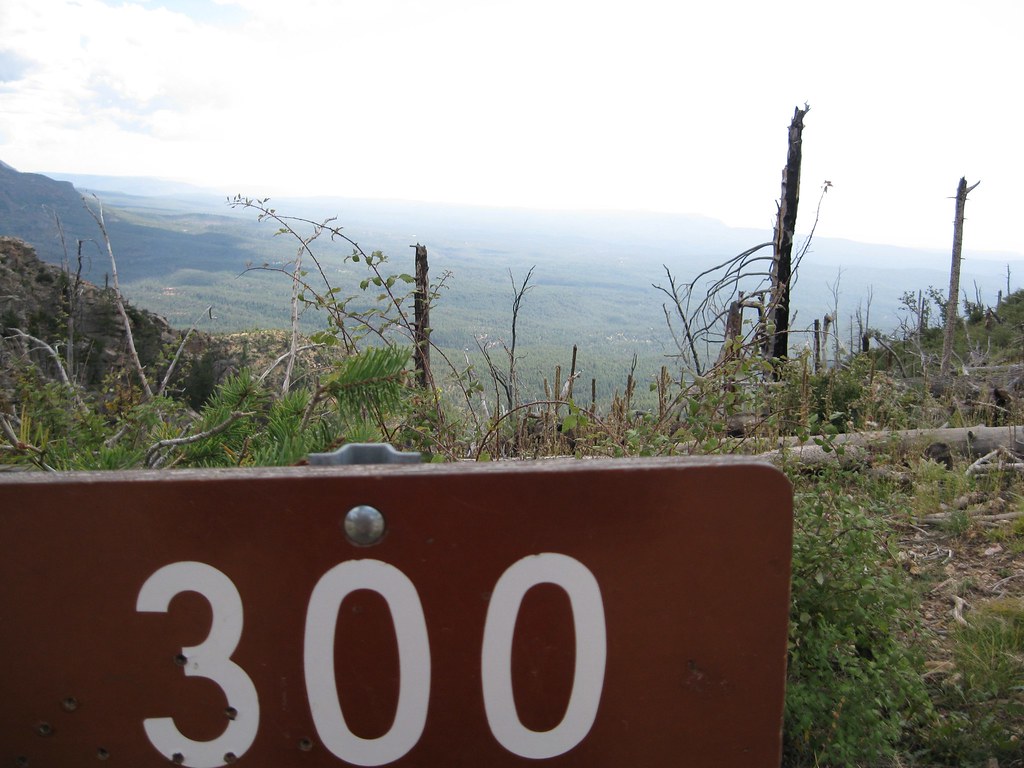
We left Pinetop and had probably fifty or so actually pretty boring miles as we headed out toward Pine and the Mongollon Rim which is the last spot we took pictures of my orange 12GS still running. (yeah that's blatant foreshadowing)

We had a diverse group and decided that we wanted to take a detour that day and head around the Mongollon Rim on what they call Rim Road 300 which is basically about a 30 mile fire road which goes from double to single wide in a few spots and really is not that challenging other than a few blind corners and some steep ups and downs - all sans mobile phone reception.


We bid farewell to the two riders with us on true street bikes and we took our fully loaded 12GS's with luggage and we hit the woods at a reasonable pace. The road was twisty enough to keep us interested and the pace and conditions were enough to keep us challenged with our collective lack of knobby tires.

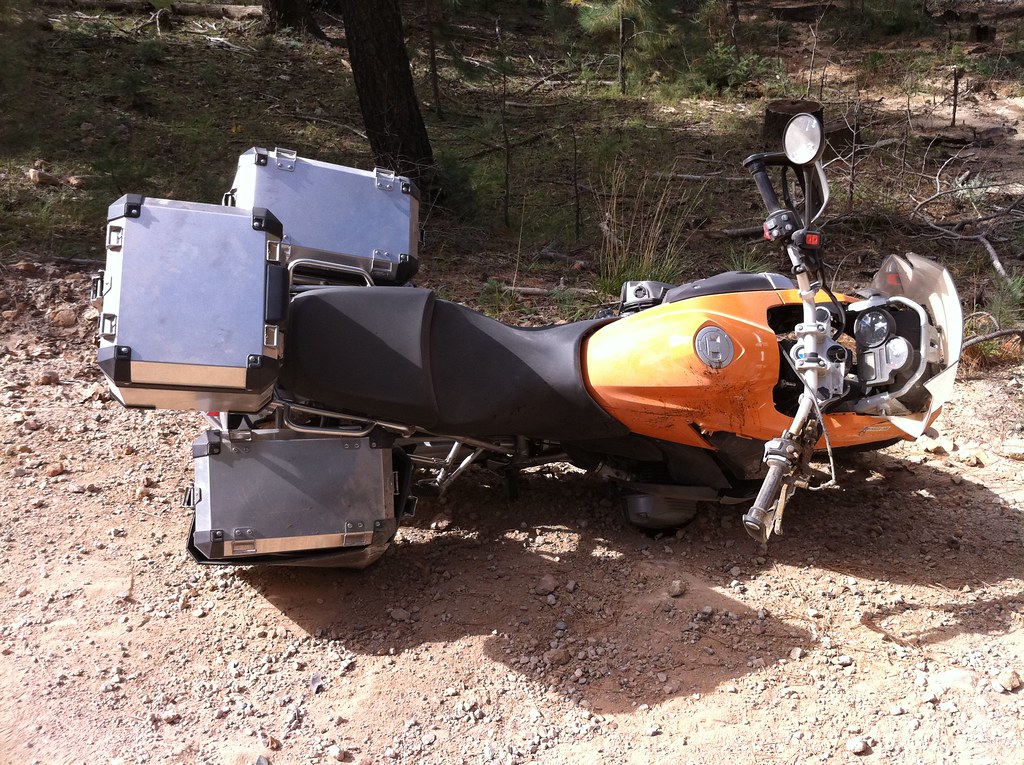
All was well until we made a hard right that quickly dipped through the trees and bunched the three of us riding together up. Matt tapped his breaks, I unfortunately reacted to him and tapped them some more and Mary who was riding behind me got to watch me wash out pretty good at about 30 mph on my right side. Rider down. Sweet.

I've crashed on the road. I've crashed on the dirt. It's nothing new to me. When you ride and you challenge yourself you eventually go down. This was the first time however that as I made my descent from standing on the pegs decelerating down hill, to slamming on my right side and watching this beautiful bike basically explode -  I recognized the whole event as it was happening. I even remember seeing the stars when I slammed.


Now I am not sure that its the speed of the crash that dictates the "forget the fall" factor, or if the adrenaline bump is what gives you that quick blank to your flash memory which keeps you from really remembering the crash. How did I go from riding to laying here? For me this was the first time that from riding to crashing to pulling my gloves off to brushing the dust off and checking for blood and broken bones- I remember it all.

The first thing I did was immediately wonder what was brown and wet and all over me. I was happy when I realized it wasn't blood. I was even more happy when I realized that I hadn't messed my pants. The gravity of the situation did set in when I realized that it was the brake reservoir - which exploded - that was all over the bike and I. Not to mention the throttle linkage, hand grip and bark-buster were annihilated. Oh and did I mention that the right cylinder head was now spewing oil and the only thing that saved me from ending up under the wreck was the now destroyed right side-case which had my laptop in it. Rad.

How the hell am I getting back to the road?

The spiffy new beemer was now officially unrideable trail-toast. Sacrificed in the name of the dual-sport gods. I was at mile marker 13 of a 30 mile mountain fire road without a sliver of mobile phone reception. How was I getting out to HWY 87? How was I getting to Flagstaff or Sedona? How was I getting lunch? Ahh dammit. This was beginning to look like a cluster. My riding today or for the weekend could be done.

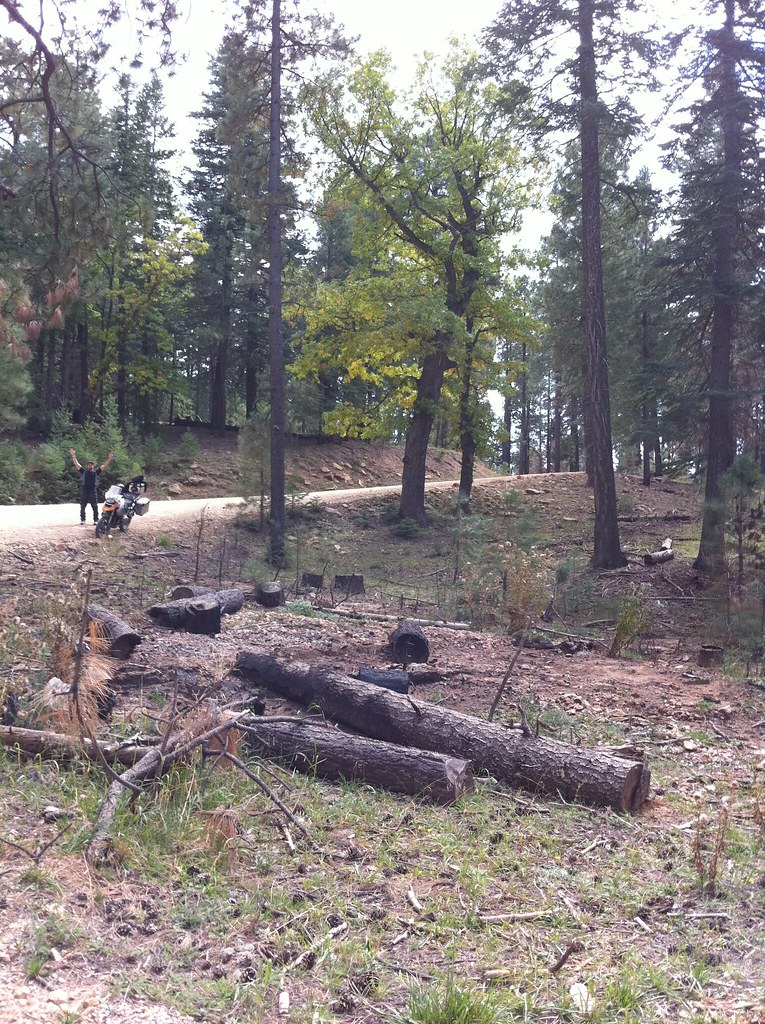
I sent Matt and Mary out for "help" (see Matt's pic at right as he pulled away) and I sat there in complete quiet on my top cases, in the sun next to a wrecked GS propped up on a log. (Look I took a panorama!) It was actually really serene and I couldn't help but notice that there was no wind, no bird noise, no cars and no one else. There was a solid 5 minutes where I could not hear anything but the sound of myself breathing. I don't think I have ever experienced that in my life. It was actually pretty neat. I was ready to be eaten by a cougar or the Mongollon Monster at that point, but in that quiet time I hatched a plan.

I quickly disassembled my side cases and got my gear together. After about 20 minutes I heard the faint sound of a motor as it grew closer. While I expected to see a truck or quad come around the corner, I was greeted with a 70 year old man and his wife in a Chrysler 300m. Yes it's as ridiculous as it sounds. A maroon Chrysler 300m. On a dirt road. On a mountain. Driven by two septuagenarians. At 12:30pm. On a Saturday. Sight-seeing?!? WTF?

After I flagged them down, I convinced them that I would try not to get their back seat dirty or kill them, they let me load up my non-mangled side and top cases with my luggage into their trunk and climb in. 13 miles to out. Let's do this.

Loell rode like the wind and his wife was a hell of a cheerleader. I just held on. At the end of the road the rest of my group was as surprised as I was to see a 300m emerge from the wooded trail and even more amazed that they let me ride in the back; dirt and all.

I learned at that point that we lost half the group including Matt. We were 100 miles from Flagstaff. Lunch was no where to be found. I also learned that one of our guys with service called the Eagle Rider at 12:45pm and a new 12GS was going to be brought up from Scottsdale to me with a truck to go fish the wrecked bike out of the woods. Sweet. At this moment I laid down in momentary defeat. It was about 2pm.

It was now about 1:30 and the new bike was at a minimum 2 hours away. The next stop was Flagstaff, which I had no way to get to. I divided up my gear from my cases across Joe, Scott and Mary's bikes - wished them good luck in finding Matt - and with all my dirty and beat up gear hitched a ride to the nearest town. 30 miles SW to Payson, AZ.

Bert, the bricklaying mountain man / good samaritan that gave me a lift dropped me in a shopping center after 30 miles of small talk and we bid farewell. Thanks Bert - if you ever read this. I wish I had a pic with you. You were a regular fellow from the South West. You were what I expected. You were an all around good human and you helped me out.

I walked into Mackey's Grill in Payson at 3:30pm covered in bike destruction. I asked to hang for an hour as my new GS was on its way. Thank god that place was run by high-school girls that wanted to save a lost puppy that day. Because I was their puppy, and after 4 hours I was still there. There were apparently bike delivery "issues" and after 5 cups of coffee, a steak, a piece of pie and a lot of boredom, the bike showed up on the back of a flatbed. The 3rd bike had now arrived.

After pulling the bike off the bed, the driver then turned to me and asked: "So where is the wrecked bike?" How did he not know? This was sad for both of us and a problem. The bike was 27 miles up HWY 87 then 13 miles into the woods.

I was sad because the cost of the tow-job just probably went up for me significantly and the tow truck driver was equally sad having just realized that he was going to have to drive 13 miles into the mountain woods alone in the moonlight to go pick up a wounded GS which had previously been left for dead on a single lane dirt trail. Man, we could have both used a Miller High Life at that moment.

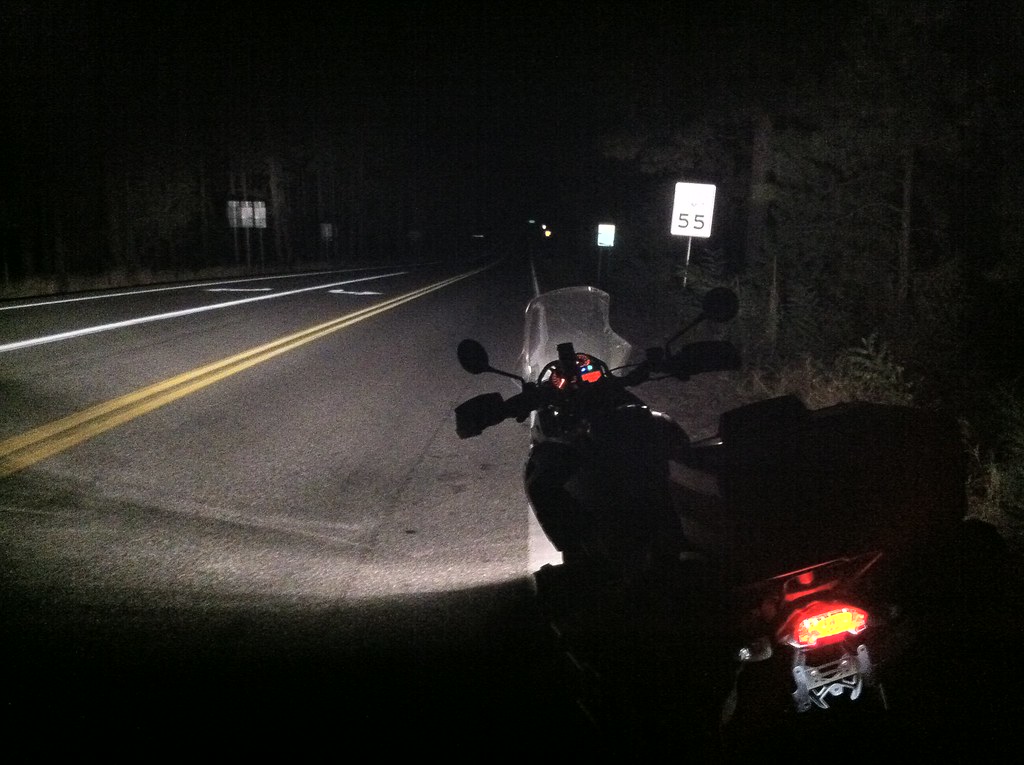
I bid farewell to the Mackey's Grill parking lot and began my solo ascent 130 miles into the darkenss from Payson to Sedona to meet up with the group.

Where 87 meets 260 in Strawberry AZ, about to head to Sedona in the dark.

At this point I had missed dinner, I missed Flagstaff, I missed most of Sedona and the red rocks, I missed the Phillies game and now I had to hope for a critter free night ride on Rte. 260 through Camp Verde to Sedona with no mobile reception or life-line to the world. If I had hit an Elk it was all over.

I arrived a solid two hours later around 9:30 at the Day's Inn Sedona, just as everyone was arriving back from dinner. Not surprisingly, the two hours solo on the road from Payson to Sedona was probably one of my favorite parts of the trip - except for the frantic messages from the tow driver who could not find the bike in the woods and ended up not picking it up.

There is just something about being alone on a bike in a strange place devoid of certain senses and distractions that usually cloud your chances of really experience what is at hand. Some of my favorite times to let my mind wander are all by myself on two wheels. I have a feeling that there are a large number of riders out there which may share a similar sentiment.

Day 2 ended for me with a Miller High Life (they had one waiting for me), a good story and a Lunchable from the Circle K across from the hotel - its all that was open - and I hadn't eaten in hours. I was happy to have my place back as one of eight vs rogue adventurer / sad clown.

Did I mention that Matt, although we lost him off of Rim Road 300, had miraculously made it to Flagstaff on his own, rode right up to the group, had a delicious lunch and got to enjoy the red rocked riding of Sedona later that afternoon. As you can tell I am not at all bitter. He also had prime rib for dinner while I was at Mackey's. Like I said, I am not at all bitter. Seriously. I'm not.

Here is Matt in Sedona, not really wondering if I died, with a full stomach.

Check out the Flickr Photo Album of Day 2

DAY 3 - Sedona to Anthem - 200 Miles

So other than my Sedona hotel room smelling like the Grateful Dead had been there the previous two weeks, the fiasco portion of my trip was finally over. It was an absurd 9 hour debacle which apparently was unavoidable. Did I mention the orange crashed bike was still in the woods?

According to the tow company, they had made it to mile marker 12 of the Rim road and turned around when they knew the bike was at mile marker 13 - apparently the night was too dark. Awesome. I was having nightmares of Sasquatch parting that thing out all night on ADVRider. The only saving grace was that it had forged wheels which are less desirable than the cross-spoked - so I am hoping that was a deal-breaker for would-be thieves and they let it be.

After the adventure we had, had over the previous 48 hours I was really thinking that day 3 was going to be flat in comparison. I could not have been more wrong. We left Sedona and shot up to Jerome on 89A which was one of the best roads I have ever ridden - both in and out. Let me repeat, 89A to and from of Jerome is one of the best roads I have ever ridden. 12 Blissful miles.
Sweeper after sweeper with tight switchbacks inbetween. There are few roads in the states that I would place in the same elite class of that stretch. We took it all the way up to Jerome where we made a brief pit stop only long enough to make a lap around the block while making fun of Joe for being scared of ghosts incessantly.

Leaving Jerome we shot over Mingus Mountain toward Yarnell and the twisties stayed as tight and fast as they were on the ride up. Again I have to reiterate, this is some of the best riding you will experience in your life. The ride from Jerome to the Prescott Valley should be the last ride for motorcyclists on death row. Amazingly good. (see the map above)

As our heart rate slightly lessened we shot down to the Ranch House in Yarnell for some amazing side of the road, hole in the wall, home-made Mexican food.

From the Ranch House in Yarnell it was off toward Prescott, then back to Anthem for the night until an accident forced us to detour through Congress, AZ to get around a multi-mile backup.

We saw an everglade Air Boat and a TransAlp go by on the same trailer while stopped here.

From the detour to Anthem, the hotel pool and a 12 pack from the Gas station was only an hour or so. Denny's for dinner. Seduced by "Moons over my hammy" once again. Ride complete. 30 miles to Scottsdale bright and early and a full day in the airport.

New friends, new roads and a slew of new stories. It was also a blast to have Matt along with me for the adventure. The crew was a dynamite group of riders from all over the states and they were all riders who took great pride in representing a sport and industry which deserves a better reputation than what is usually is given.

I am not sure if this is how you do Arizona, but I enjoyed it - at least until I get the deductible.

-Anthony
Follow Me on G+

Check out the Flickr Photo Album of Day 3


GEAR PERFORMANCE RECAP:

Firstgear Rainier Jacket -  Overall I was equally impressed with with the performance of the Firstgear Rainier Jacket from both a weather and protective side of things. It vented when it was hot and in Pinetop when it was cold it more than covered the chilly bases. I will say after crashing in it two years in a row, that the d3o molecular does a great job. They were two pretty good slams ans while I did have a bruised forearm and elbow, it barely even got sore. Without the jacket on it would have easily ended up with a broken arm. I 100% hit that hard. My only gripe with the setup of the jacket is that you have to make sure the elbow armor is correctly lines up or else you may feel the Velcro a bit without long sleeves on. If you do feel it it is nothing that a quick armor adjustment can not fix.

Firstgear HT Air Overpants (2010) - I have worn the 2009 HT Air Overpants. There is nothing overly exciting about them. They were a basic warm weather commuter pant. I knew going in that based on my previous experience with the 2010 HT Air Overpants, at longer distances they should be even more of a pleasant surprise compared to their much less well designed 2009 counterparts. The first thing I noticed wearing my set of 32s was that depending on the position of the bike I was going to absolutely take advantage of the ability to move the knee armor pocket 3" vertically and between 1.5 and 2 inches horizontally. The first day I noticed that the armor position I had set was rolling the armor toward the inside of the bike too far so I moved it a bit laterally to correct this. I tested that knee armor on day two by crashing on my right side. Not the most pleasant of experiences but the armor did it's job and I walked away without limping. As far as warm weather breathability, they performed well. I also used them for a few hours with the liners in on the beginning of day two to combat cold and they did a good job at blocking the wind. As I mentioned on day 1 I opted to let my legs get wet while riding Salt River Canyon into some moderate rain. The pants and my damp drawers dried quickly at speed when the rain ended.

SIDI Adventure Rain Boots - Shhh - don't tell, but I definitely wore SIDI boots on the Firstgear ride. I was expecting a bit of a gnarly trip this year so I wanted to beef up to a boot with shin protection and a more protective husk as a whole. I get shivers thinking about the typical touring bike wreck involving a footpeg meeting a shin and taking a left at the ER. The Adventure Rain's were comfortable and since I had already broken them in, they did not miss a beat. It was also not my first time wearing them in the rain so I knew what to expect there and they held up as well as usual. The new experience I had with them was when I dumped the bike. Like low sides before, many times you end up with a foot under the bike sliding between the bike and the ground. This time was no exception and the ground by being a mix of hard packed dirt and protruding rocks offered an uneven surface for sliding. The reinforced boot hard parts did a good job deflecting the impact and the weight of the bike and "stab" of the foot-peg. The Cam-Lock buckles all took a beating with out breaking as well. On day three I has some bruising and stiffness in my elbow and knee but not so much as a mild bruise on either feet.


Shoei Helmet Care Guides

Shoei produced a series of videos detailing how exactly to clean a Shoei Helmet, how to properly care for a Shoei shield and one video that explains Shoei's Impact Inspection Services. These are greatly helpful to any Shoei Helmet owner.

Here is the Shoei Helmet Cleaning video:


Shoei RF-1100 Helmet
Needs: Soft, Non-Abrasive Cloth; Soft Toothbrush; Non-Solvent and Non-Acidic Cleaning Agents

The guts of the helmet can be cleaned either by hand or in a washing net in a washing machine on the gentle cycle. If the liner is non-removable, the interior can be cleaned with a soft cloth and a neutral cleaning agent. The EPS itself must be kept free of any solvents or heated elements, so a soft cloth used gently should do the trick. When drying the helmet, it is important to not use any heat or to expose it to direct sunlight to prevent damage to the shell. Putting the helmet in front of a fan with the face shield open is the recommended method of drying.


Next is the demonstration of how to properly care for a Shoei Helmet Shield:


Proper care of your face shield can dramatically extend the life of the shield. If there is ever a problem with the seal of the shield to the eyeport beading, it can be relatively easily solved. If there is any sort of whistling sound or wind noise when riding, you can cover up each quadrant of the shield where it meets the beading, one area at a time. When the whistling stops, you've identified the problem area. You can also slide anything thin, like a piece of paper, between the shield and the beading. If you can slide it in between at any point, you know you've got a loose seal. You can then make the base plate adjustment by loosening a screw and moving the base plate slightly in the direction it needs to go to create the tautness of the shield meeting the beading. They also suggest regular tightening of the base plate to ensure that the screws haven't come loose and also regular cleaning using warm water, a soft cloth, and a neutral cleaning agent. Always steer clear of cleaners that use solvents, acids, or are alkaline-based.


Finally, this video illustrates Shoei's Impact Inspection Services:


Shoei Qwest Helmet
Shoei provides a service that allows you to send your helmet in for an inspection that will determine whether or not the helmet is safe to be worn again. The inspection of the helmet and return shipment from Shoei are both free of charge. Generally, it is suggested that you mail your helmet in for an inspection if the helmet was dropped, if the helmet was impacted during a crash, if the helmet was exposed to extreme heat, or if the helmet was exposed to chemicals or chemical fumes. Ensure that the helmet is packed properly by checking out the demo in the video. This is a really cool free service offered by Shoei for their loyal supporters. It should definitely be taken advantage of in any questionable safety situation.

Check out our full selection by visiting our Motorcycle Helmets page.

-RetroZilla

Related:
Shoei Qwest Helmet Review
Shoei Multitec Modular Helmet Review
Shoei RF-1100 Helmet Review
Shoei Hornet DS Helmet Review

Wednesday, October 27

Alpinestars Jacket Blowout

In making way for new product, two popular Alpinestars Jackets are on crazy discount right now. Out with the old, in with the new, as the saying goes.. which means that we have two huge deals for you right now. Jump on `em before supplies run out!


First up is a waterproof textile jacket from AStars, the Alpinestars 7-10 WP Jacket. We've got the 7-10 for $119.97 right now, 40% off and down from 200 bucks until supplies run out. A PU-coated 600D exterior for abrasion-resistance with removable CE rated shoulder and elbow armor and an upgradeable foam back pad for protection. It is 100% waterproof with a removable thermal liner. Available in four colors.
The second major deal from Astars is the Alpinestars ATL Leather Jacket, which is now $209.97, down 40% from $349.95 while supplies last. The ATL Leather is 1.2-1.4 full grain leather for abrasion resistance with strategic perforated leather panels for cooling. It has removable CE rated shoulder and elbow armor with upgradeable chest and back padding. The ATL also has a removable thermal vest with YKK zippers throughout the jacket.

Check the product pages for full details on these insane deals.

-RetroZilla

Gerbing's Heated Gear Connection Guide


Heated motorcycle gear can be difficult to operate. Tons of wires, knobs, switches, etc -- but how do you actually link everything together properly and make sure it works correctly. We've got you covered with our eight-minute Gerbing's Heated Gear Connection Guide that details how to connect the gear to your bike, how to connect it to other pieces of gear, how to control temperature of multiple pieces of gear, and a walkthrough of various accessories produced by Gerbing's.


As a recommendation, we suggest that you choose the Gerbing's Dual Temperature Controller when picking up your first piece of Gerbing's Heated Gear. While you may only have one heated item to start, odds are you'll pick up something else down the road. Most people seem to start with a jacket liner or a pair of heated gloves, realize how much it improves cold weather riding, and pick up more gear. Beyond one piece of gear, the Gerbing's Single Temperature Controller would become irrelevant. The Dual Controller has two temperature regulation knobs, one of which controls the heat output in the jacket, the other controls all other pieces of gear- gloves, pants liners and insoles.

The other major thing you have to know is how to connect the gear to the battery. It is crucial that you connect the Gerbing's Battery Harness directly to the battery's terminals and not battery tender pigtails. There is also the Gerbing's 12 Volt DC Plug Adaptor which connects on one end to your temperature controller and the other end goes into a Cigarette Lighter style plug. There is also a Gerbing's Accessory Plug Kit that has a battery harness, an accessory plug and a port that can be mounted anywhere on the bike for easy connection of your Gerbing's gear.


We hope this video is helpful in understanding the proper method of connecting and controlling your Gerbing's Heated Motorcycle Gear. As always, feel free to give us a ring at 877-792-9455 or CS@RevZilla.com and we'll be happy to answer any further questions.

To see our full selection, visit our Heated Motorcycle Gear section at RevZilla.com.

Stay warm, stay safe, extend the riding season!

-RetroZilla

Related:
Gerbing's Heated Gear Buying Guide
Cold Weather Motorcycle Glove Guide
New Motorcycle Gear for August 2010

Tuesday, October 26

Icon Patrol All-Weather Gear

Brand new for this Fall, Icon has released a line of products designed to get you through the toughest of riding conditions. With the Icon Patrol All-Weather Gear, they've utilized waterproof breathable technologies coupled with high-denier fabrics to create their highest-level of technical textile gear to date. Check out the video below from Icon that highlights the features and benefits of the Icon Patrol Waterproof Jacket, Icon Patrol Waterproof Pants, and Icon Patrol Waterproof Gloves.


Both the jacket and pants feature a waterproof seam-sealed nylon textile chassis for superior waterproofing. CE rated Field Armor lives in the shoulders, elbows, hips and knees while the dual-density foam back pad is upgradeable to the Icon CE level 2 Stryker back protector. YKK waterproof zippers and magnetic storm flap closures ensure the waterproof elements of these garments. The 3M scotchlite paneling glows extremely bright when lights hit it ensuring that you'll be seen during grey rainy rides. The jacket has a total of twelve storage pockets for plenty of cargo carrying. It also features a removable hydration pocket that can be filled with a water bladder. The Thermolite insulated liner provides warmth but can be taken out during warm weather
rides, combining with the intake and exhaust ventilation
scheme to keep you cool.


For added protection, there are heavyweight ballistic nylon impact panels. Both the jacket and pants feature a hi-viz yellow version that meets US Military PPE specifications for hi-visibility. The pants feature six storage pockets for added cargo carrying and full-length zippers along the sides of the legs for easy in and out. They also have a removable suspender system for those who like to utilize that. Keep in mind that these pants are designed to fit as overpants, so if you wear a size 32 pant, purchase the 32 if you plan to wear them as overpants; if you'll rock them commando, buy one size smaller, in this case, a 30.


The Icon Patrol Waterproof Gloves are constructed from waterproof textile with an abrasion-resistant Battlehide goatskin palm. The goatskin provides suppleness in addition to superior tactile feel for using the controls. The back of the hand has reinforced rubber armor in the knuckles in addition to a reflective graphics package for visibility. There is pre-curving for comfort and to reduce fatigue from long-term riding. Finally, there is a visor wiper built into the left index finger for quick cleans of the shield.


Here is the Icon video that details the Icon Patrol Waterproof Boots:


Icon Patrol Waterproof Boots are constructed from a durable leather upper with a 100% waterproof membrane. The sole is slip-resistant with an axialmetric steel shank for support. There is built-in internal ankle protection and shifter interface nubs atop the toe box. The dual adjustable stabilizer straps utilize aluminum positive-lock buckles to create an excellent ratcheting adjustability system for proper fit. The lacing system is hidden underneath a leather panel, keeping your laces safely and securely out of the way. It also looks pretty awesome to have the laces hidden.

This new line of Icon Fall 2010 Gear looks like a home run to us. We're pretty excited to hear feedback on the Patrol line as it starts to come into stock. Stay tuned for more new Icon gear details.

-RetroZilla

Related:
Fall 2010 Icon Motorcycle Jacket Guide
Icon Alliance Helmet Review
Icon Variant Speedmetal Review - Fall 2010

Monday, October 25

Nate Kern's RevZilla BMW S1000RR at VIR


Nate Kern is the man and we are proud to sponsor him. He is a rocksolid rider and standup guy. A long-time racer, when he is not tearing it up in CCS he's out making riders giggle at track days across North America as the BMW S1000RR Ambassador and test rider. Nate was kind enough to go "all murdered out" in black for the CCS race at VIR in September and give us some major coverage on his S1000RR.

Check out more pics on our live.revzilla.com

Nate's wearing a black REV'IT! Victory Race Suit


-BoochZilla

Alpinestars Gloves- New Fall 2010 Gear Reviews

As part of a ton of new and improved gear for the Fall of 2010, Alpinestars released a series of new gloves. And we reviewed them all. From the Alpinestars Arctic Drystar Gloves, that pair perfectly with Alpinestars Durban Jacket and Pants, to the leather functionality of the Alpinestars Vega Drystar Glove, all the way through the Alpinestars Tech Road Gore-Tex Gloves, one of AStars brawniest cold weather waterproof breathable gloves to date. These gloves all offer different levels of functionality and application, and we will
discuss that below after the video reviews.

First is the Alpinestars Arctic Drystar Gloves Review:


Alpinestars Arctic Drystar Gloves
Built with the Cold Weather Adventure Touring rider in mind, the Alpinestars Arctic Drystar Gloves will tackle any wintry conditions. The Arctic Drystar has a full textile upper construction with a Clarino-reinforced goatskin palm. The Goatskin offers a great mix of protection and tactile feel and the reinforcements are in high-wear and impact areas. For protection, there is a hard PU over-molded knuckle with 4mm EVA foam pads on the finger knuckles, wrist, and the top of the hand. The Thinsulate thermal lining provides insulation from cold temperatures and the Drystar membrane gives waterproof breathability. Stretch paneling throughout for comfort and flexibility with a third-fourth high finger bridge for protection of the pinky in a get-off situation. One of our favorite features is the hydrophobic
knitted cuff, which keeps all water out and also provides great windproofing.

Next up is our Alpinestars Vega Drystar Glove Review:


Alpinestars Vega Drystar Gloves
Constructed for Fall-Winter-Spring all-precipitation sport touring, the Alpinestars Vega Drystar Glove is a full cowhide and goatskin build. Like the Arctic, the Vega's goatskin palm provides solid tactility combined with exceptional abrasion resistance. There are synthetic suede reinforcements and 4mm EVA foam padding for added protection. The carbon fiber knuckle offers excellent armor while the high finger bridge protects the pinky from twisting in the event of a fall. There is Thinsulate thermal insulation combined with a velour lining for warmth and comfort. The Drystar built-in membrane gives remarkable waterproof breathability and the reinforced wrist cuff and landing zone ensure added protection.

Finally, our Alpinestars Tech Road Gore-Tex Glove Review:


Alpinestars Tech Road Gore-Tex Gloves
Offering the highest level of waterproof breathability with a Gore-Tex membrane, the Alpinestars Tech Road Gore-Tex Gloves are the ultimate in slick design and high-level performance for Fall-Winter-Spring all-precipitation riding. They are constructed from full-grain leather with Stone PU palm reinforcements for safety and accordion stretch paneling for mobility.The knuckle is a PU protection system and there is 4mm EVA foam padding injections at the finger knuckles and thumb. The Tech Roads have a velour insulating liner with a thinner micro-fleece in the palm, designed for use with heated grips. Like the previous two gloves, there is a high finger bridge that protects the pinky. When it comes to cold weather touring, this is the pick from Alpinestars.

Don't miss the full Alpinestars Fall 2010 Gear Collection. To see all gloves of this ilk, visit our Winter Motorcycle Gloves section.

-RetroZilla

Related:
Alpinestars Boots for Fall 2010
Alpinestars Durban Gore-Tex Suit Review
Alpinestars Tech Touring Gear
Cold Weather Motorcycle Glove Guide

Friday, October 22

Firstgear TPG Escape Pants Review

As part of their new line of gear for Fall 2010, Firstgear released the brand new Firstgear TPG Escape Pants. Previous iterations of these pants were cut poorly with very little articulation and a boxy-shape. This made them pretty uncomfortable especially over the course of the long-distance rides they were designed to tackle. They had already developed jacket ready to compete with European brands in the bombproof ADV touring beast Firstgear TPG Rainier Jacket and they needed the pants to go along with it. With a complete overall and redesign from the bottom up, the TPG Escapes are the perfect mate for the Rainier and an excellent option for the Adventure Tourer.

Here's our full Firstgear TPG Escape Pants Review:


The Firstgear TPG Escape Pants are a true four-season, all-weather pant designed for Adventure and Sport Touring. They come in both mens' and womens' specific cuts and are a great match for the aforementioned Rainier for men or the Firstgear TPG Monarch Jacket for women. These pants will get you through any form of precipitation and a full range of temperatures, performing spectacularly under any conditions. Now let's move on to why we're so high on these pants.

In the last version, Firstgear was using basic Knox CE rated knee and hip armor but for the new version they upgraded to d3o molecular-level armor. For those unaware, d3o utilizes the newest technologies for motorcycle protection. It is soft, flexible, lightweight and extremely comfortable to wear within your gear, but upon impact it becomes rigid and resilient, dispersing all impact energy across the surface area of the armor. It's next-level, straight up. The fitment and cut of the new Escapes is also an enormous upgrade over the previous model. The old model was extremely flat and boxy in its cut; the new version offers much more flexibility and much better comfort over the course of long rides.
Liner Pants

Firstgear also improved the waterproofing of these pants. It was always built into the shell, but this model uses the Hypertex Plus Waterproof Breathable membrane rather than regular Hypertex. The Hypertex Plus membrane makes these pants 2x as waterproof breathable over extended rides as they were before. With the membrane built into the shell, you know you'll be covered whether you have the thermal liner in or not. Which brings us to the inner pant liner that is standalone and can be worn as a destination layer once you hop off the bike. The pants use two-ounce fiberfill insulation for excellent thermal qualities and have articulation in the knee and seat for comfort. They have two front pockets styled like jeans pockets and just generally look stylish when you're at your destination.

Let's run through the other features of the TPG Escapes:

  • 600D Nylon Exterior with Teramid Reinforced Kevlar Underlays
  • YKK Rubberized Zippers Throughout for Waterproofing
  • Two large intake vents; four storage pockets
  • Side Zips extend above knees for easy on/off; protected by internal storm flap with rain gutter
  • Elasticized internal storm cuff with silicone grip wraps around boot to keep moisture out
  • Ratcheting waist adjustments
  • Reflective paneling throughout
  • Heat-resistant anti-wear material on inner legs
  • 10" Connection Zipper
  • 2-year crash protection policy
As we've said in previous posts, we're extremely excited and impressed with the Firstgear Fall 2010 Gear lineup. To see more pants like this, visit our All Weather Motorcycle Pants page.

-RetroZilla

Related:

Thursday, October 21

AGV AX-8 DS Helmet: The New Enduro

The future of dualsporting is about to arrive on the shelves of RevZilla.com in the form of the brand new AGV AX-8 DS Helmet. Incredibly lightweight, resilient and built to the specifications required by the true ADV Touring rider, the AGV AX8 DS looks like it was designed for the enduro rider from another galaxy. Just look at the lines of this helmet, with its aggressive style, and you can see that it'd be a perfect match for a Ducati Multistrada or Hypermotard. Let's get into the reasons why this helmet is a game changer in the dual sport world.

The AX-8 Dual shares many of the same qualities of AGV Helmets' high-end racing helmet, the AGV GP-Tech. The shell construction is a woven Fiberglass, Carbon Fiber and Kevlar blend which equates to excellent strength and safety values in addition to maximum lightness. A medium-sized AX-8 DS helmet arrives at 1400g, just over 3.1lbs. Just to put that in perspective, the lightest helmet in stock at RevZilla.com weighs 1367g and is a full carbon fiber construction, built for aggressive street riding. The Arai XD-3 Helmet, one of our bestselling enduro helmets, comes in at the 1600g mark, a full 7 ounces, nearly a 1/2 pound, more than the AX-8.

The AGV AX-8 DS offers all of the functionality we've come to expect from a standout dualsport helmet. The eyeport is absolutely enormous for ease of vision on-road and off, there is a removable faceshield and peak for multiple configurations including shield off and pair of goggles on for all your dirt riding needs. The peak is also adjustable for aerodynamics. The ventilation scheme on the AX-8 is very similar to the GP-Tech; the difference being that the vents are even bigger on this helmet. With five large intakes, two side and two rear exhaust vents, the AX-8 will flow a ton of air to keep you comfortable during extreme rides.

The guts on the AX-8 Dual are completely removable and washable, utilizing CoolMax and Dry-Comfort technologies to create a comfortable moisture-wicking and anti-bacterial interior. The helmet is DOT and ECE 22.05 certified, with a double-density EPS that comes in four different sizes across the size range of this helmet. The shell itself comes in three different sizes to provide a superior fit as you go up or down in sizes. The Double-D ring retention system on the chin strap is made from titanium for durability and the mouth piece on the chin vent is completely removable and washable.

Beyond all the excellent functionality, the AX-8 is slick and will look great on a dualsport bike. We think it has the chance to be a true game-changer in the dualsport helmet market. Stay tuned for more info as we will deliver it as we get it.

-RetroZilla

Related:
Dual Sport and Enduro Helmet Buying Guide
Shoei Hornet DS Helmet Review
Arai XD-3 Helmet Review

Wednesday, October 20

Alpinestars Tech 1-R Race Suit, Leather Jacket Review

The most technical pieces of racing apparel in the Alpinestars lineup, the brand new Alpinestars Tech 1-R Racing Suit and Alpinestars Tech 1-R Leather Jacket are below only the Race Replica in the AStars lineup. Offering the highest level of quality in materials, technologies and technical innovations, the Tech 1-R succeeds the Alpinestars MX-1 Suit and Leather Jacket and features some major upgrades over previous versions. Along with the brand new Alpinestars GP Pro Leather Jacket and Alpinestars GP Pro Racing Suit, Alpinestars has again raised the bar and made it that much more difficult for the competition to compete with their racing gear.

Check out our Alpinestars Tech 1-R Leather Jacket Review:


And here's our Alpinestars Tech 1-R Racing Suit Review:


Let me discuss the features that both the jacket and the pants have. The first significant upgrade over the MX-1 is the 3D bubble mesh liner. For those that don't know, 3D mesh creates a microclimate by fixing a space between your body and the outer materials of the gear. This creates an air pocket within the jacket (or suit) which enhances airflow and keeps your body temperature regulated, whether it is hot or cold out. Another major step forward is the multiple-snap connection system for the Bionic Race Back Protector. In the MX-1, there was only a single snap which clearly is not going to fit everyone. The three-position snap system in the Tech 1R ensures versatility based on your height and where you like to position the protector for comfort and safety.

The ergonomics and comfort of the Alpinestars Tech 1-R Race Suit have also been upgraded over the MX-1 Suit. They've added an enormous U-shaped accordion stretch panel on the back that significantly improves flexibility for racing and is extremely innovative in that we've not seen this on any suit from any other manufacturer. In addition to the possibility of a back protector upgrade, the chest pad compartments (which come stock with PE padding) are sized to fit the Alpinestars Bionic Chest Pads for upgraded protection. This is true for both the jacket and race suit.

Now let's take a look at the rest of the features:
  • 1.3mm top grade cowhide leather with perforation throughout for ventilation and comfort
  • External PU shoulder and knee sliders meet MotoGP spec
  • CE rated GP-Series elbow and knee armor, CE rated shoulder armor
  • Aramidic stretch paneling on sleeves and crotch for flexibility and airflow
  • Liner is antimicrobial, removable and washable
  • Foam padding inserts for added protection
  • YKK zips throughout with semi-locking cuff zippers
  • Accordion stretch paneling for fit and flex

Another stellar offering in the Alpinestars lineup, the Tech 1-R suit and leather jacket are sure to please all the Alpinestars loyalists out there. Check out the full Alpinestars Fall 2010 Gear lineup and don't miss our full selection of Motorcycle Racing Suits. Also, see the competitors of the Tech 1-R jacket by visiting our Leather Motorcycle Jacket section.

-RetroZilla

Related:

Tuesday, October 19

Nolan N90 Helmet Review: Brand New Modular

Always integrating new technologies into their innovative designs, Nolan Helmets continues to be one of the leaders in the modular helmet market. Their newest offering, the Nolan N90 Helmet, continues their tradition of making high quality helmets that offer a great deal of versatility for the Adventure and Sport Touring rider. With configuration options of full-face or jet-helmet style, the N90 promises to be another standout in the Nolan line, one which already includes the best-selling Nolan N43 Helmet and the Nolan N103 Helmet. Check out our full video review of the Nolan N90 Helmet below.


One of Nolan's goals in developing the N90 was to create a modular helmet that would perform off-the-charts in all touring conditions with a solid feature set but keep it at a reasonable price point. They really did a great job with this helmet, maintaining all of the standard Nolan features with some forward-thinking additions. The aerodynamically designed shell is built using polycarbonate and has a built-in spoiler to help with keeping the helmet stable at speed. It features a top-gun-style retractable sun visor that is the same thickness as the clear Lexan outer shield and easily operated with a rubberized glove-friendly slider. It provides excellent eye protection when the main shield is not in use.

One of the features that really sets this helmet apart is the noise levels. There are few modulars that will provide this quiet of a ride and one of the big reasons for this is the design of the faceshield. Where the faceshield of the N90 meets the shell, both the shield and shell are grooved near the hinge to maintain a super-snug seal against the gasket, preventing any excessive wind noise. The thick neck roll also aids in maintaining low noise levels. The shield comes with a Pinlock anti-fog insert, something we don't see with many helmets on the market (Nolan N90S Helmet does not have the Pinlock system). Utilizing Lexan to construct the shield is also pleasing, since Lexan is a nearly indestructible high-grade plastic.


The chinbar mechanism, which Nolan calls the Centromatic release system, is also a standout feature of the N90. It has a single release locking mechanism at the bottom that is pulled which allows the button above the chin vent to be pushed in, and using this as a handle, the chin bar easily lifts up. This same mechanism also keeps the helmet locked in place when in the flipped-up position so there is no risk of the chin bar falling down. The N90 also has superior ventilation, much better than most modulars out there. The large exhaust grid vent coupled with the dual intakes and chin vents creates great venturi effect airflow that will keep you
cool when you're rocking this helmet full-face. This helmet
is also ready for the NCOM Communication System.

Overall, we wouldn't doubt if this helmet quickly became one of the most popular modulars on the market. With its upgraded feature set that builds on the strong base of Nolan technology, it is going to be difficult for competitors to compete.

Check out other options by visiting our Modular Helmets page at RevZilla.com.

-RetroZilla

Related:
Nolan N43 Helmet Review
Modular Motorcycle Helmet Buying Guide
Shoei Multitec Modular Helmet Review 
Motorcycle Helmet Buying Guide

Monday, October 18

Firstgear Expedition Suit Review

As part of their brand new line of gear for Fall 2010, Firstgear released a one-piece suit that boasts many of the technologies used in their high-end TPG line of gear but arrives at an extremely reasonable suit. The Firstgear Expedition Suit performs at a level of suits that are $1000 or more but comes in at the $499 price point. Firstgear did a brilliant job with the design of this suit, making it ready for all-season and all-weather performance no matter what Mother Nature has in store. It is great for the commuter but also for the hardcore adventurer. Check out our Firstgear Expedition Suit review below.


The Firstgear Expedition Suit is built large enough to wear over your clothes with plenty of room for base layers in the wintertime. The outer shell is 600D with the waterproof breathable element built-in; you will not get wet, and your sweat can evaporate through. The ventilation is absolutely incredible in this suit: 10 total vents; two chest, two thigh, two pit, two sleeve cuff vents and two large vertical back exhaust vents. All the vents and pockets in this suit are protected by YKK rubberized zippers to keep precipitation out. There are two pass-through pockets on the legs to access what you've got stored in your pants underneath. Two chest Dry Pockets are there for storing anything that you don't want to get wet, they won't let any water in. The main zipper is a two-way Scuba-style RiRi zipper that is rubberized and has two rows of teeth. All of this waterproofing beneath a double storm flap with a rain gutter.

For comfort and flexibility there are completely waterproof stretch panels (awesome, right?) built into the crotch, front and back of the knees and the back. There is also an adjustable belt for ideal fitment. The shoulders, elbows and knees are protected by CE certified armor that has 3 inches of up/down and 1.5 inches of sideways adjustability. There is the convenience of a zip that goes all the way from the ankle to above the knee which utilizes a two-way rubberized YKK zip and rests atop an internal double storm flap with a rain gutter. The cuffs of the pants feature elasticized internal storm cuffs that have silicone grips to hold tight to your boots and keep any water from creeping up your leg. For added protection from water, there is an integrated rain hood that tucks under the collar and fits under the helmet.

Little conveniences, like the adjustable collar that features a hook-and-loop lockdown system to prevent flapping, and the set-it-and-forget-it sleeve cuffs, really provide excellent bang for the buck with this suit. The back pad can be upgraded to d3o molecular level armor, it comes stock with temperfoam which is also in the hips. This is a straight-up knockout product from Firstgear, who continues to improve their line of ADV touring gear with each passing year.

Visit our Textile Motorcycle Suits section to see more. To see the entire line, visit the Firstgear Fall 2010 page at RevZilla.com.

-RetroZilla

Related:
Firstgear Fall 2010 Gear Guide
Firstgear HT Overpants
Cold Weather Touring Motorcycle Gear Guide

Friday, October 15

GoGo Gear Review: Fashionable Protective Ladies Gear

GoGo Gear Black Trench Jacket
GoGo Gear's mission is a simple one, but something we've not seen from any other manufacturer: make protective motorcycle gear for the female motorcyclist with a fashion-first approach. So much of what we see in the motorcycle gear world is men attempting to make gear that they think will fit a woman's shape and contours. And let's face it, we're just not that good at it. In walks GoGo Gear with their new line of high-fashion apparel that is also extremely protective. Women will look great riding their motorcycles but when they get off the bike, no one will even know they have protective gear on. Check out our GoGo Gear Buying Guide with Arlene Battishill, Founder and Co-Creator of the brand.


GoGo Gear Military Jacket
For 2010, GoGo Gear released four jackets, all of which are available at RevZilla.com. They all share the same properties in construction and protection, with subtle differences in each that differentiates them. The farthest outer layer (which is the fashion fabric) changes with each garment and the cuts vary piece-by-piece. Here are the universal features of all GoGo Gear Fall 2010 Jackets:

  • Fashion Fabric exterior atop 600D chassis
  • All jackets are 100% waterproof and breathable
  • CE Rated shoulder/elbow armor with CE Level 2 back protector
  • Reflective detailing at collar, cuffs and belt
  • Lycra windcuff in each sleeve for wind-blocking
GoGo Gear Grey Trench Jacket

As I said, each of these garments has its own distinctive exterior styling as the photos in this post demonstrate. The GoGo Gear Grey Trench Jacket and the GoGo Gear Black Trench Jacket each fall slightly below the waist. The GoGo Gear Military Jacket is cut slightly longer, with oversized pockets and stylish faux leather detailing throughout. The GoGo Gear Hologram Jacket, takes the core of the Military and combines it with an absolutely jaw-dropping exterior fabric to create the most visually stunning jacket of the bunch. Each of these jackets is unique in design and truly represents a huge departure from anything available to female motorcycle riders currently.


GoGo Gear Hologram Jacket
We are thrilled that GoGo Gear came onto our radar with a truly innovative concept for the motorcycle world. We think all the stylish ladies out there are going to be pleased that they finally have an alternative to all the gear that we men create that just doesn't quite fit them right. GoGo Gear is meant to fit perfectly and look great on or off the bike. We think they did a great job with this line and we are psyched to add them to the RevZilla ladies' collection. Check out all our Ladies Textile Jackets here.

-RetroZilla

Related:
Related Posts with Thumbnails